generate 函数分析
首先直接看代码:
module.exports = function generate (name, src, dest, done) {
  const opts = getOptions(name, src) // 获取配置信息
  const metalsmith = Metalsmith(path.join(src, 'template'))  // 定义 Metalsmith 工作目录  ~/.vue-templates`
  const data = Object.assign(metalsmith.metadata(), { // 定义一些全局变量,这样可以在 layout-files 中使用
    destDirName: name,
    inPlace: dest === process.cwd(),
    noEscape: true
  })
  opts.helpers && Object.keys(opts.helpers).map(key => {
    Handlebars.registerHelper(key, opts.helpers[key])
  })

  const helpers = { chalk, logger }

  if (opts.metalsmith && typeof opts.metalsmith.before === 'function') {
    opts.metalsmith.before(metalsmith, opts, helpers)
  }

  metalsmith.use(askQuestions(opts.prompts))
    .use(filterFiles(opts.filters))
    .use(renderTemplateFiles(opts.skipInterpolation))

  if (typeof opts.metalsmith === 'function') {
    opts.metalsmith(metalsmith, opts, helpers)
  } else if (opts.metalsmith && typeof opts.metalsmith.after === 'function') {
    opts.metalsmith.after(metalsmith, opts, helpers)
  }

  metalsmith.clean(false)
    .source('.') // start from template root instead of `./src` which is Metalsmith's default for `source`
    .destination(dest)
    .build((err, files) => {
      done(err)
      if (typeof opts.complete === 'function') {
        const helpers = { chalk, logger, files }
        opts.complete(data, helpers)
      } else {
        logMessage(opts.completeMessage, data)
      }
    })

  return data
}
我们将这段代码分为以下部分来讲:
getOptions
根据这语以化的函数名就知道这是获取配置的,然后详细看下 getOptions 函数的代码:
module.exports = function options (name, dir) {
  const opts = getMetadata(dir) // 获取 meta.js 里面的信息,比如:prompts,helpers,filters 等等

  setDefault(opts, 'name', name) // 将 meta.js 里面 prompts 字段添加到 inquirer 中,完成命令行的交互
  setValidateName(opts) // 检查包的名称是否符合规范

  // 获取 name 和 email,用于生成 package.json 里面的 author 字段
  const author = getGitUser() // git config --get user.name , git config --get user.email
  if (author) {
    setDefault(opts, 'author', author)
  }

  return opts
}
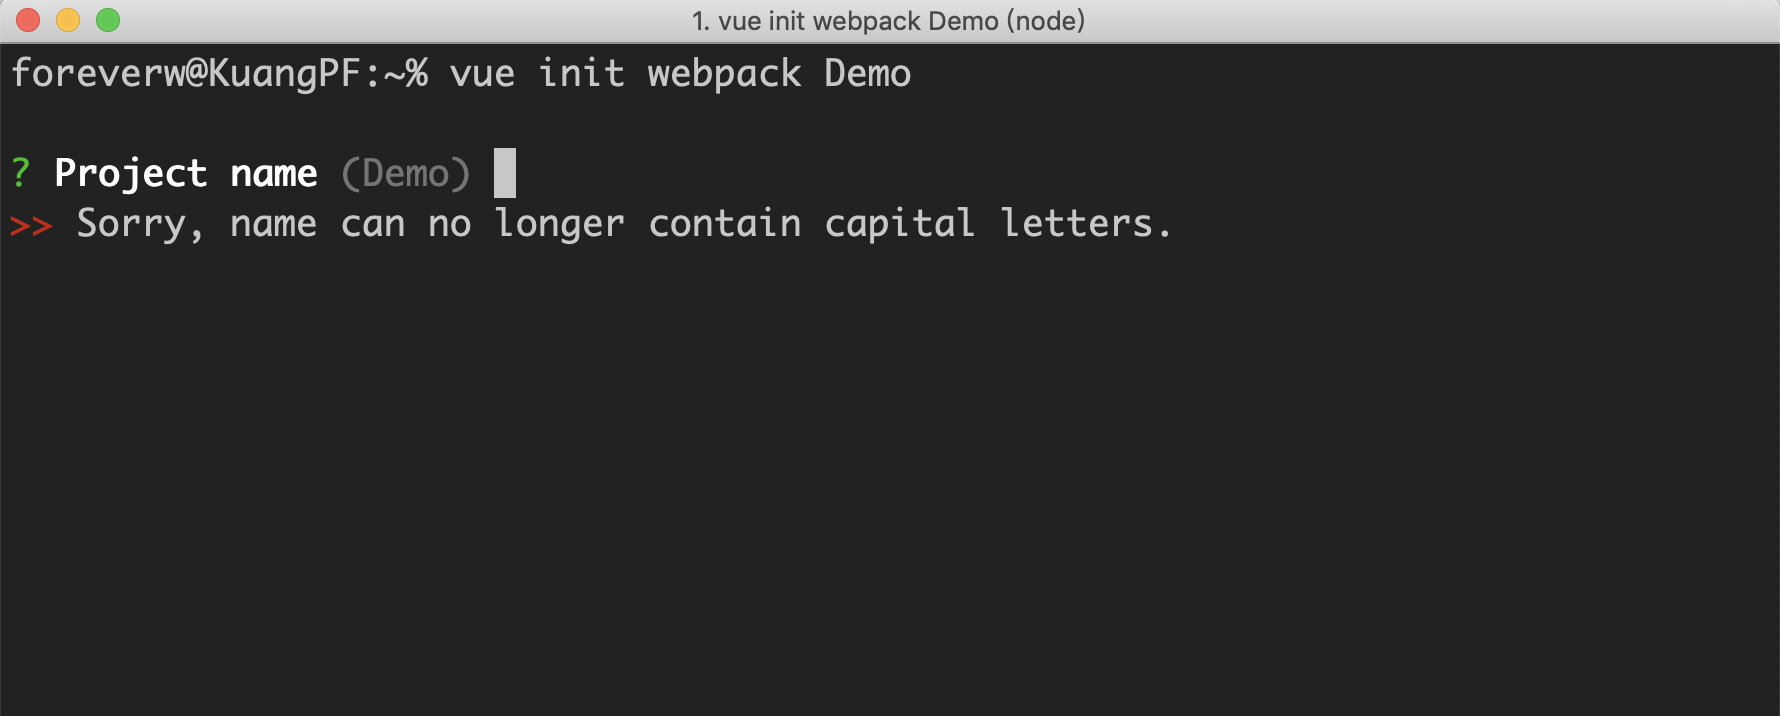
setValidateName 的作用就是利用 validate-npm-package-name 检查你输入的 app-name 是否符合 npm 包名命名规范,当然你也可以在 meta.js 中的 prompts 字段中的 name 下面增加 validate 字段来进行校验,但和 validate-npm-package-name 的规则是 && 的关系。比如,当你输入的 app-name 包含了大写字母,就会有以下的提示:

Handlebars.registerHelper
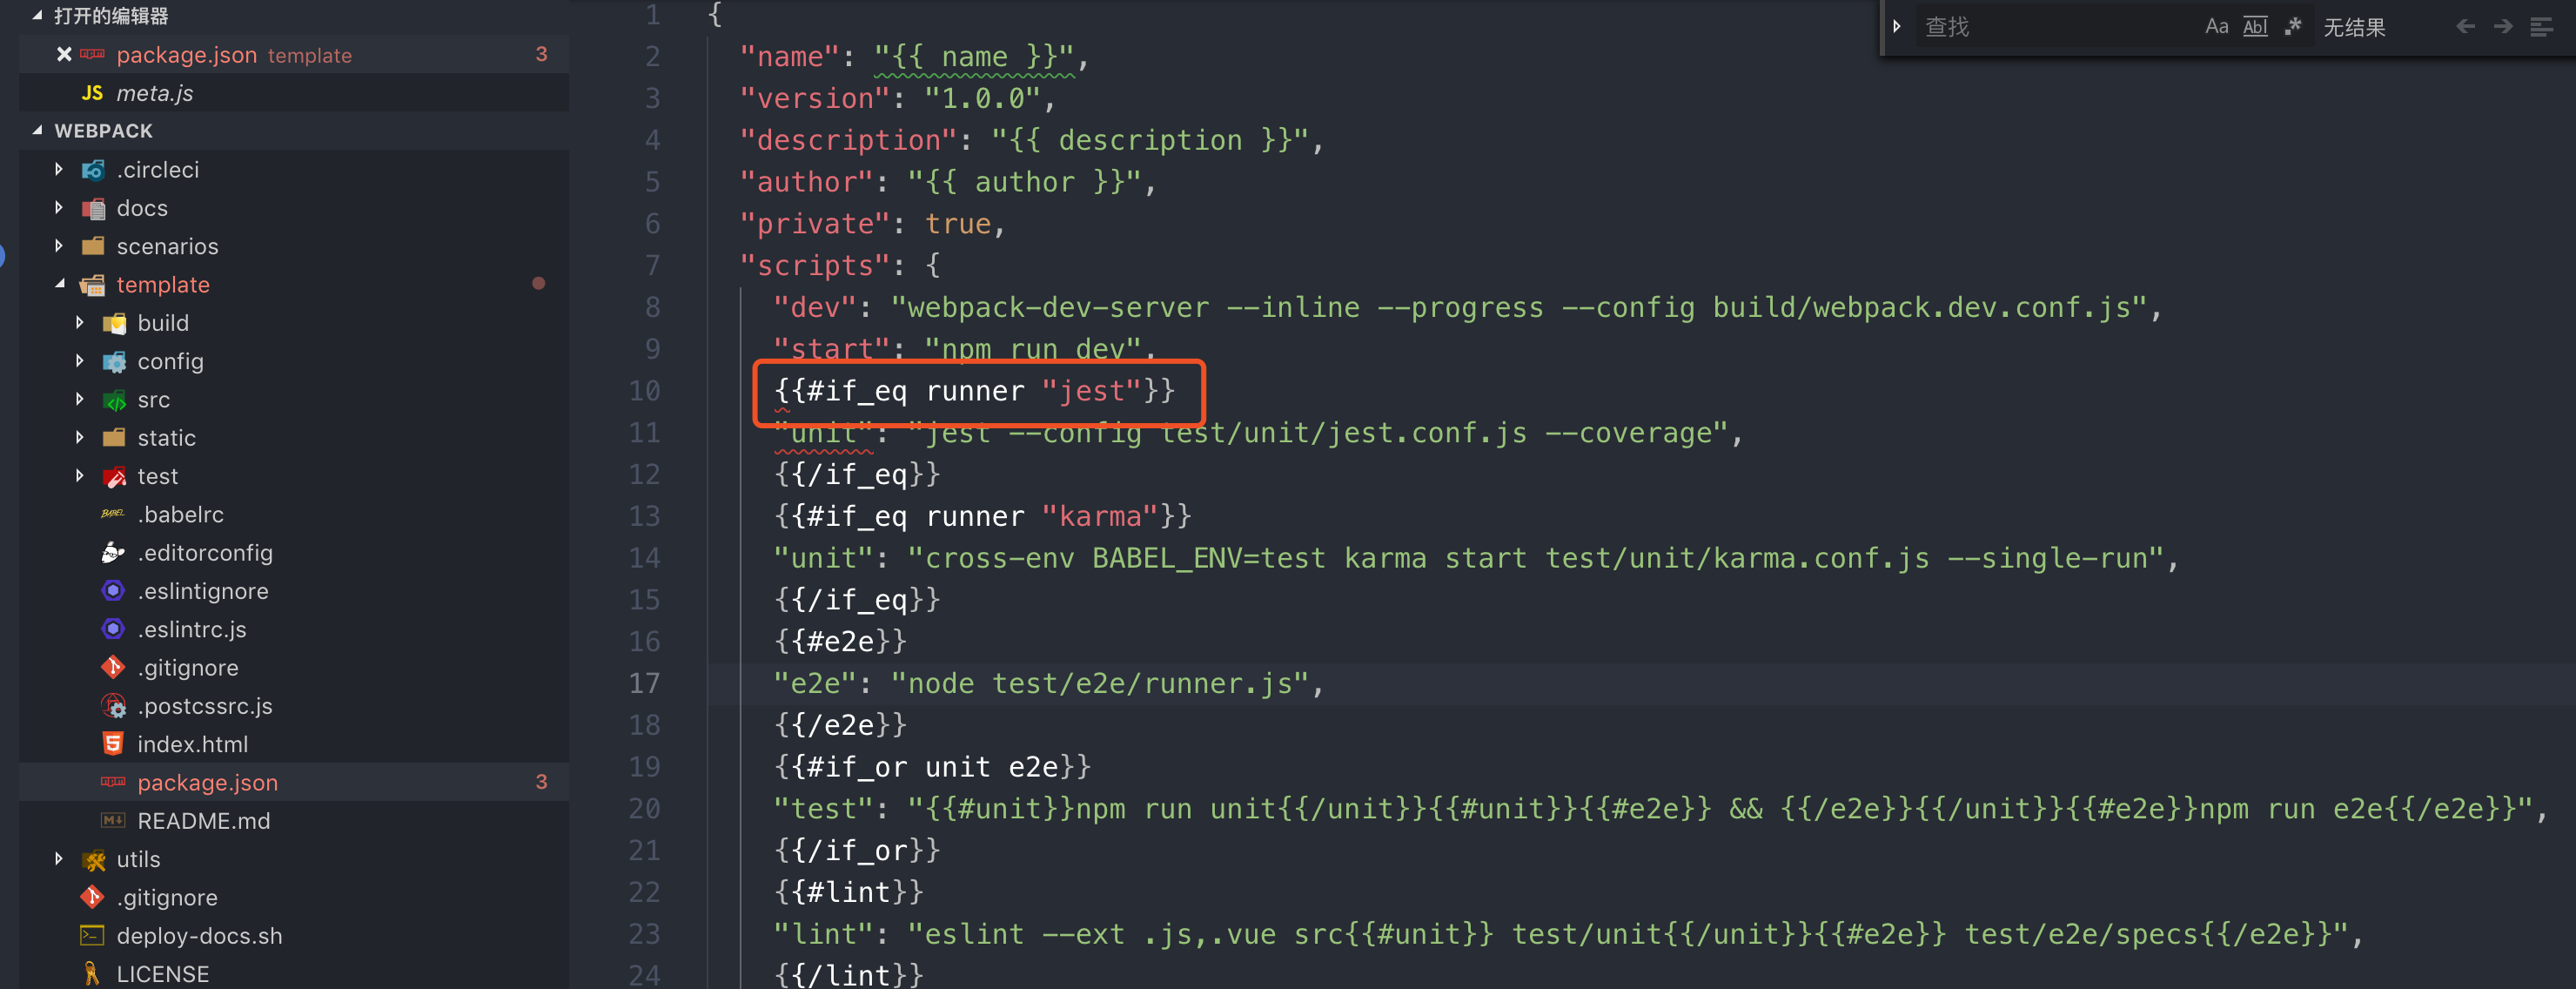
Handlebars.registerHelper 用于注册一些 helper(或者说成是一些逻辑方法),在模版中来处理一些数据,比如像源码中注册的 if_eq helper,他的作用就是判断两个字符串是否相等。然后在 webpack 的模板中就有以下的用法:

就是根据你在构建项目时选择的 test runner (Jest,Karma and Mocha,none configure it yourself) 来生成对应的 npm script。你也可以在 meta.js 中添加自定义的 helper,vue-cli 会帮你注册到 Handlebars 中。
opts.metalsmith
先看一段源码:
if (opts.metalsmith && typeof opts.metalsmith.before === 'function') {
    opts.metalsmith.before(metalsmith, opts, helpers)
  }

  metalsmith.use(askQuestions(opts.prompts))
    .use(filterFiles(opts.filters))
    .use(renderTemplateFiles(opts.skipInterpolation))

  if (typeof opts.metalsmith === 'function') {
    opts.metalsmith(metalsmith, opts, helpers)
  } else if (opts.metalsmith && typeof opts.metalsmith.after === 'function') {
    opts.metalsmith.after(metalsmith, opts, helpers)
  }
opts.metalsmith 的作用就是合并一些全局变量,怎么理解呢,我们从 webpack 模板入手。在 webpack 模板的 meta.js 中含有metalsmith.after:
module.exports = {
  metalsmith: {
    // When running tests for the template, this adds answers for the selected scenario
    before: addTestAnswers
  }
  ...
}
然后一步一步找到 addTestAnswers:
const scenarios = [
  'full',
  'full-karma-airbnb',
  'minimal'
]

const index = scenarios.indexOf(process.env.VUE_TEMPL_TEST)

const isTest = exports.isTest = index !== -1

const scenario = isTest && require(`./${scenarios[index]}.json`)

exports.addTestAnswers = (metalsmith, options, helpers) => {
  Object.assign(
    metalsmith.metadata(),
    { isNotTest: !isTest },
    isTest ? scenario : {}
  )
}
metalsmith.before 结果就是将 metalsmith metadata 数据和 isNotTest 合并,如果 isTest 为 ture,还会自动设置 name,description等字段。那么它的作用是什么呢,作用就是为模版添加自动测试脚本,它会将 isNotTest 设置为 false,而通过 inquirer 来提问又会是在 isNotTest 为 true 的情况下才会发生,因此设置了VUE_TEMPL_TEST的值会省略 inquirer 提问过程,并且会根据你设置的值来生成对应的模板,有以下三种值可以设置:
- minimal:这种不会设置 router,eslint 和 tests
- full: 会带有 router,eslint (standard) 和 tests (jest & e2e)
- full-airbnb-karma:带有 router eslint(airbnb) 和 tests(karma)
那么如何使用某一种呢,命令如下:
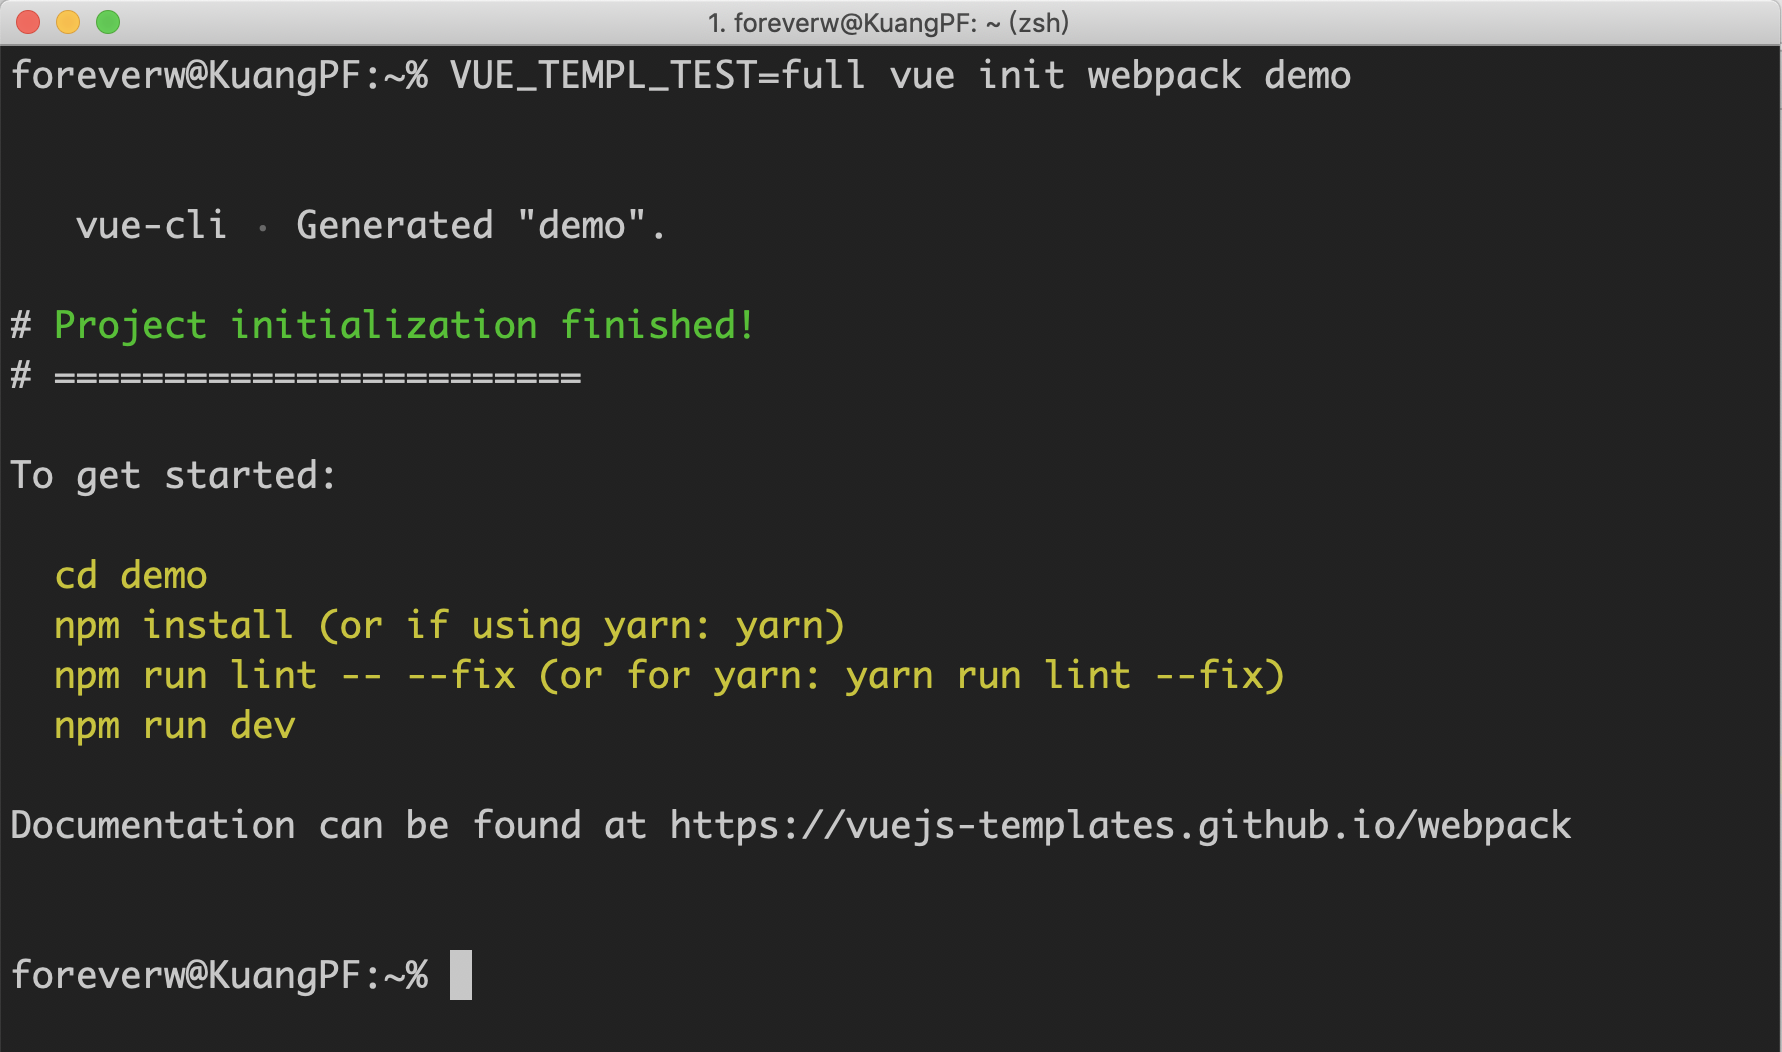
VUE_TEMPL_TEST=full vue init webpack demo
在这种情况下,会自动跳过 inquirer 的问题,并生成你设置的 VUE_TEMPL_TEST。

metalsmith.use
metalsmith.use 是 metalsmith 使用插件的写法,前面说过 metalsmith 最大的特点就是所有的逻辑都是由插件处理,在 generate 函数中一共有使用了三个 metalsmith 插件,分别为:askQuestions filterFiles renderTemplateFiles 。
- askQuestions
function askQuestions (prompts) {
  return (files, metalsmith, done) => {
    ask(prompts, metalsmith.metadata(), done)
  }
}
ask 函数又是独立出来的一个模块,源码(主要代码)为:
//  ...
module.exports = function ask (prompts, data, done) {
  async.eachSeries(Object.keys(prompts), (key, next) => {
    prompt(data, key, prompts[key], next)
  }, done)
}
function prompt (data, key, prompt, done) {
  // skip prompts whose when condition is not met
  if (prompt.when && !evaluate(prompt.when, data)) {
    return done()
  }

  let promptDefault = prompt.default
  if (typeof prompt.default === 'function') {
    promptDefault = function () {
      return prompt.default.bind(this)(data)
    }
  }

  inquirer.prompt([{
    type: promptMapping[prompt.type] || prompt.type,
    name: key,
    message: prompt.message || prompt.label || key,
    default: promptDefault,
    choices: prompt.choices || [],
    validate: prompt.validate || (() => true)
  }]).then(answers => {
    if (Array.isArray(answers[key])) {
      data[key] = {}
      answers[key].forEach(multiChoiceAnswer => {
        data[key][multiChoiceAnswer] = true
      })
    } else if (typeof answers[key] === 'string') {
      data[key] = answers[key].replace(/"/g, '\\"')
    } else {
      data[key] = answers[key]
    }
    done()
  }).catch(done)
}
根据这个语以话的命令以及看一些 ask 函数的实现,就明白这个 askQuestions 就是通过 inquirer.prompt 来实现命令行交互,并将交互的值通过 metalsmith.metadata() 存到全局,然后在渲染模板的时候直接获取这些值。
- filterFiles
function filterFiles (filters) {
  return (files, metalsmith, done) => {
    filter(files, filters, metalsmith.metadata(), done)
  }
}
filter 函数也是独立出来的一个模块,源码(主要代码)如下:
module.exports = (files, filters, data, done) => {
  if (!filters) {
    return done()
  }
  const fileNames = Object.keys(files)
  Object.keys(filters).forEach(glob => {
    fileNames.forEach(file => {
      if (match(file, glob, { dot: true })) { // ~/.vue-templates 下面如果有文件名和 filters下的某一个字段匹配上
        const condition = filters[glob]
        if (!evaluate(condition, data)) { // 如果 metalsmith.metadata()下 condition 表达式不成立,删除该文件
          delete files[file]
        }
      }
    })
  })
  done()
}
大致描述以下这个过程: meta.js 中 filter 字段如下:
filters: {
    '.eslintrc.js': 'lint',
    '.eslintignore': 'lint',
    'config/test.env.js': 'unit || e2e',
    'build/webpack.test.conf.js': "unit && runner === 'karma'",
    'test/unit/**/*': 'unit',
    'test/unit/index.js': "unit && runner === 'karma'",
    'test/unit/jest.conf.js': "unit && runner === 'jest'",
    'test/unit/karma.conf.js': "unit && runner === 'karma'",
    'test/unit/specs/index.js': "unit && runner === 'karma'",
    'test/unit/setup.js': "unit && runner === 'jest'",
    'test/e2e/**/*': 'e2e',
    'src/router/**/*': 'router',
  },
一看应该就大致知道是什么意思。以 .eslintrc.js 为例,在模板中默认是有 .eslintrc.js 文件的。利用 vue-cli 初始化一个项目的时候,会询问你 Use ESLint to lint your code? ,然后 inquirer.prompt 通过回调将你回答的值存在 metalsmith.metadata() 的 lint 字段中,在调用 filter 方法的时候就会通过 evaluate 函数来判断在 metalsmith.metadata() 下 lint 的值是否为 true,如果为 false 的就会删除 .eslintrc.js。
- renderTemplateFiles
renderTemplateFiles 源码如下
function renderTemplateFiles (skipInterpolation) {
  // 在 meta.js 的 skipInterpolation 下面添加跳过插值的文件,这样在渲染的时候就不会使用 consolidate.handlebars.render 去渲染页面
  skipInterpolation = typeof skipInterpolation === 'string'
    ? [skipInterpolation]
    : skipInterpolation
  return (files, metalsmith, done) => {
    const keys = Object.keys(files)
    const metalsmithMetadata = metalsmith.metadata()
    async.each(keys, (file, next) => {
      // skipping files with skipInterpolation option
      if (skipInterpolation && multimatch([file], skipInterpolation, { dot: true }).length) {
        return next()
      }
      const str = files[file].contents.toString()
      // do not attempt to render files that do not have mustaches
      // 如果在该文件中没有遇到 {{}} (小胡子)就跳过该文件
      if (!/{{([^{}]+)}}/g.test(str)) {
        return next()
      }
      render(str, metalsmithMetadata, (err, res) => {
        if (err) {
          err.message = `[${file}] ${err.message}`
          return next(err)
        }
        files[file].contents = new Buffer(res)
        next()
      })
    }, done)
  }
}
renderTemplateFiles 的主要功能就是利用 consolidate.handlebars.render 将 ~/.vue-templates下面的 handlebars 模板文件渲染成正式的文件。
metalsmith.build
metalsmith.build 就是使用刚才分析的 askQuestions 、filterFiles 和 renderTemplateFiles 三个插件将项目的初始化文件生成出来并输出到目标目录,完成后输出相关的信息。
generate 函数分析就到此为止,在下一节会通过一张流程图来总结整个 vue init 命令的过程。